

Designing a Nightstand Valet Tray
When marketing people talk about iterative design, what they really mean is “our designers fucked up a lot.” Over the past five years, I have been trying to design a valet tray for my nightstand. This is a story of iterative design in the I “fucked up a lot” sense. The end result is incredibly simple, betraying the fact that I am, in fact, a pretty terrible woodworker and not especially creative. Each time I made something, it just didn’t feel right. So, over the years, I have built, rebuilt, tweaked, lived with and scrapped multiple designs. There were three major designs, each with multiple iterations, and I will go through them below and discussed what didn’t work and why.
If you would have told me I should have a valet tray ten or fifteen years ago, I would have laughed at you. It seemed like such a waste of money, but over time, it became clear I needed something. When my wife and I first got married we were too poor to buy a bedroom set. When we moved into our first real apartment, we were still too poor. But when we bought our first house, we had saved some pennies and we got a bedroom set made of cherry. It included a bed frame, two chest of drawers, and a nightstand. Later we purchased a second nightstand. The entire set has grown older gracefully, turning a dark, rich red, as cherry is want to do. But cherry isn’t the hardest wood in the world and so after more than 15 years of dropping that day’s carry on my nightstand, mostly to have quick access to a flashlight, my wife started to notice some dings and scratches. They aren’t cutting through the finish, but they become visible in the right light. Apparently dropping steel, aluminum, and titanium objects on cherry surfaces 7713 times leaves marks.
Going through this keep in mind one thing: I do not own a woodworking CNC machine. With such a device I could have prototyped out these iterations and all of sub-steps in a weekend. Instead, it took me building jigs, buying router bushings, making a shooting board, and lots and lots of thinking about the best process to do things. I am not saying all that time and effort equals the cost of a small woodworking CNC machine, but it might have. As someone into both woodworking and EDC, I am, above all other skills, good at justifying (or “justifying”) tool purchases.
Iteration 1: Big Chunk o’ Walnut Design
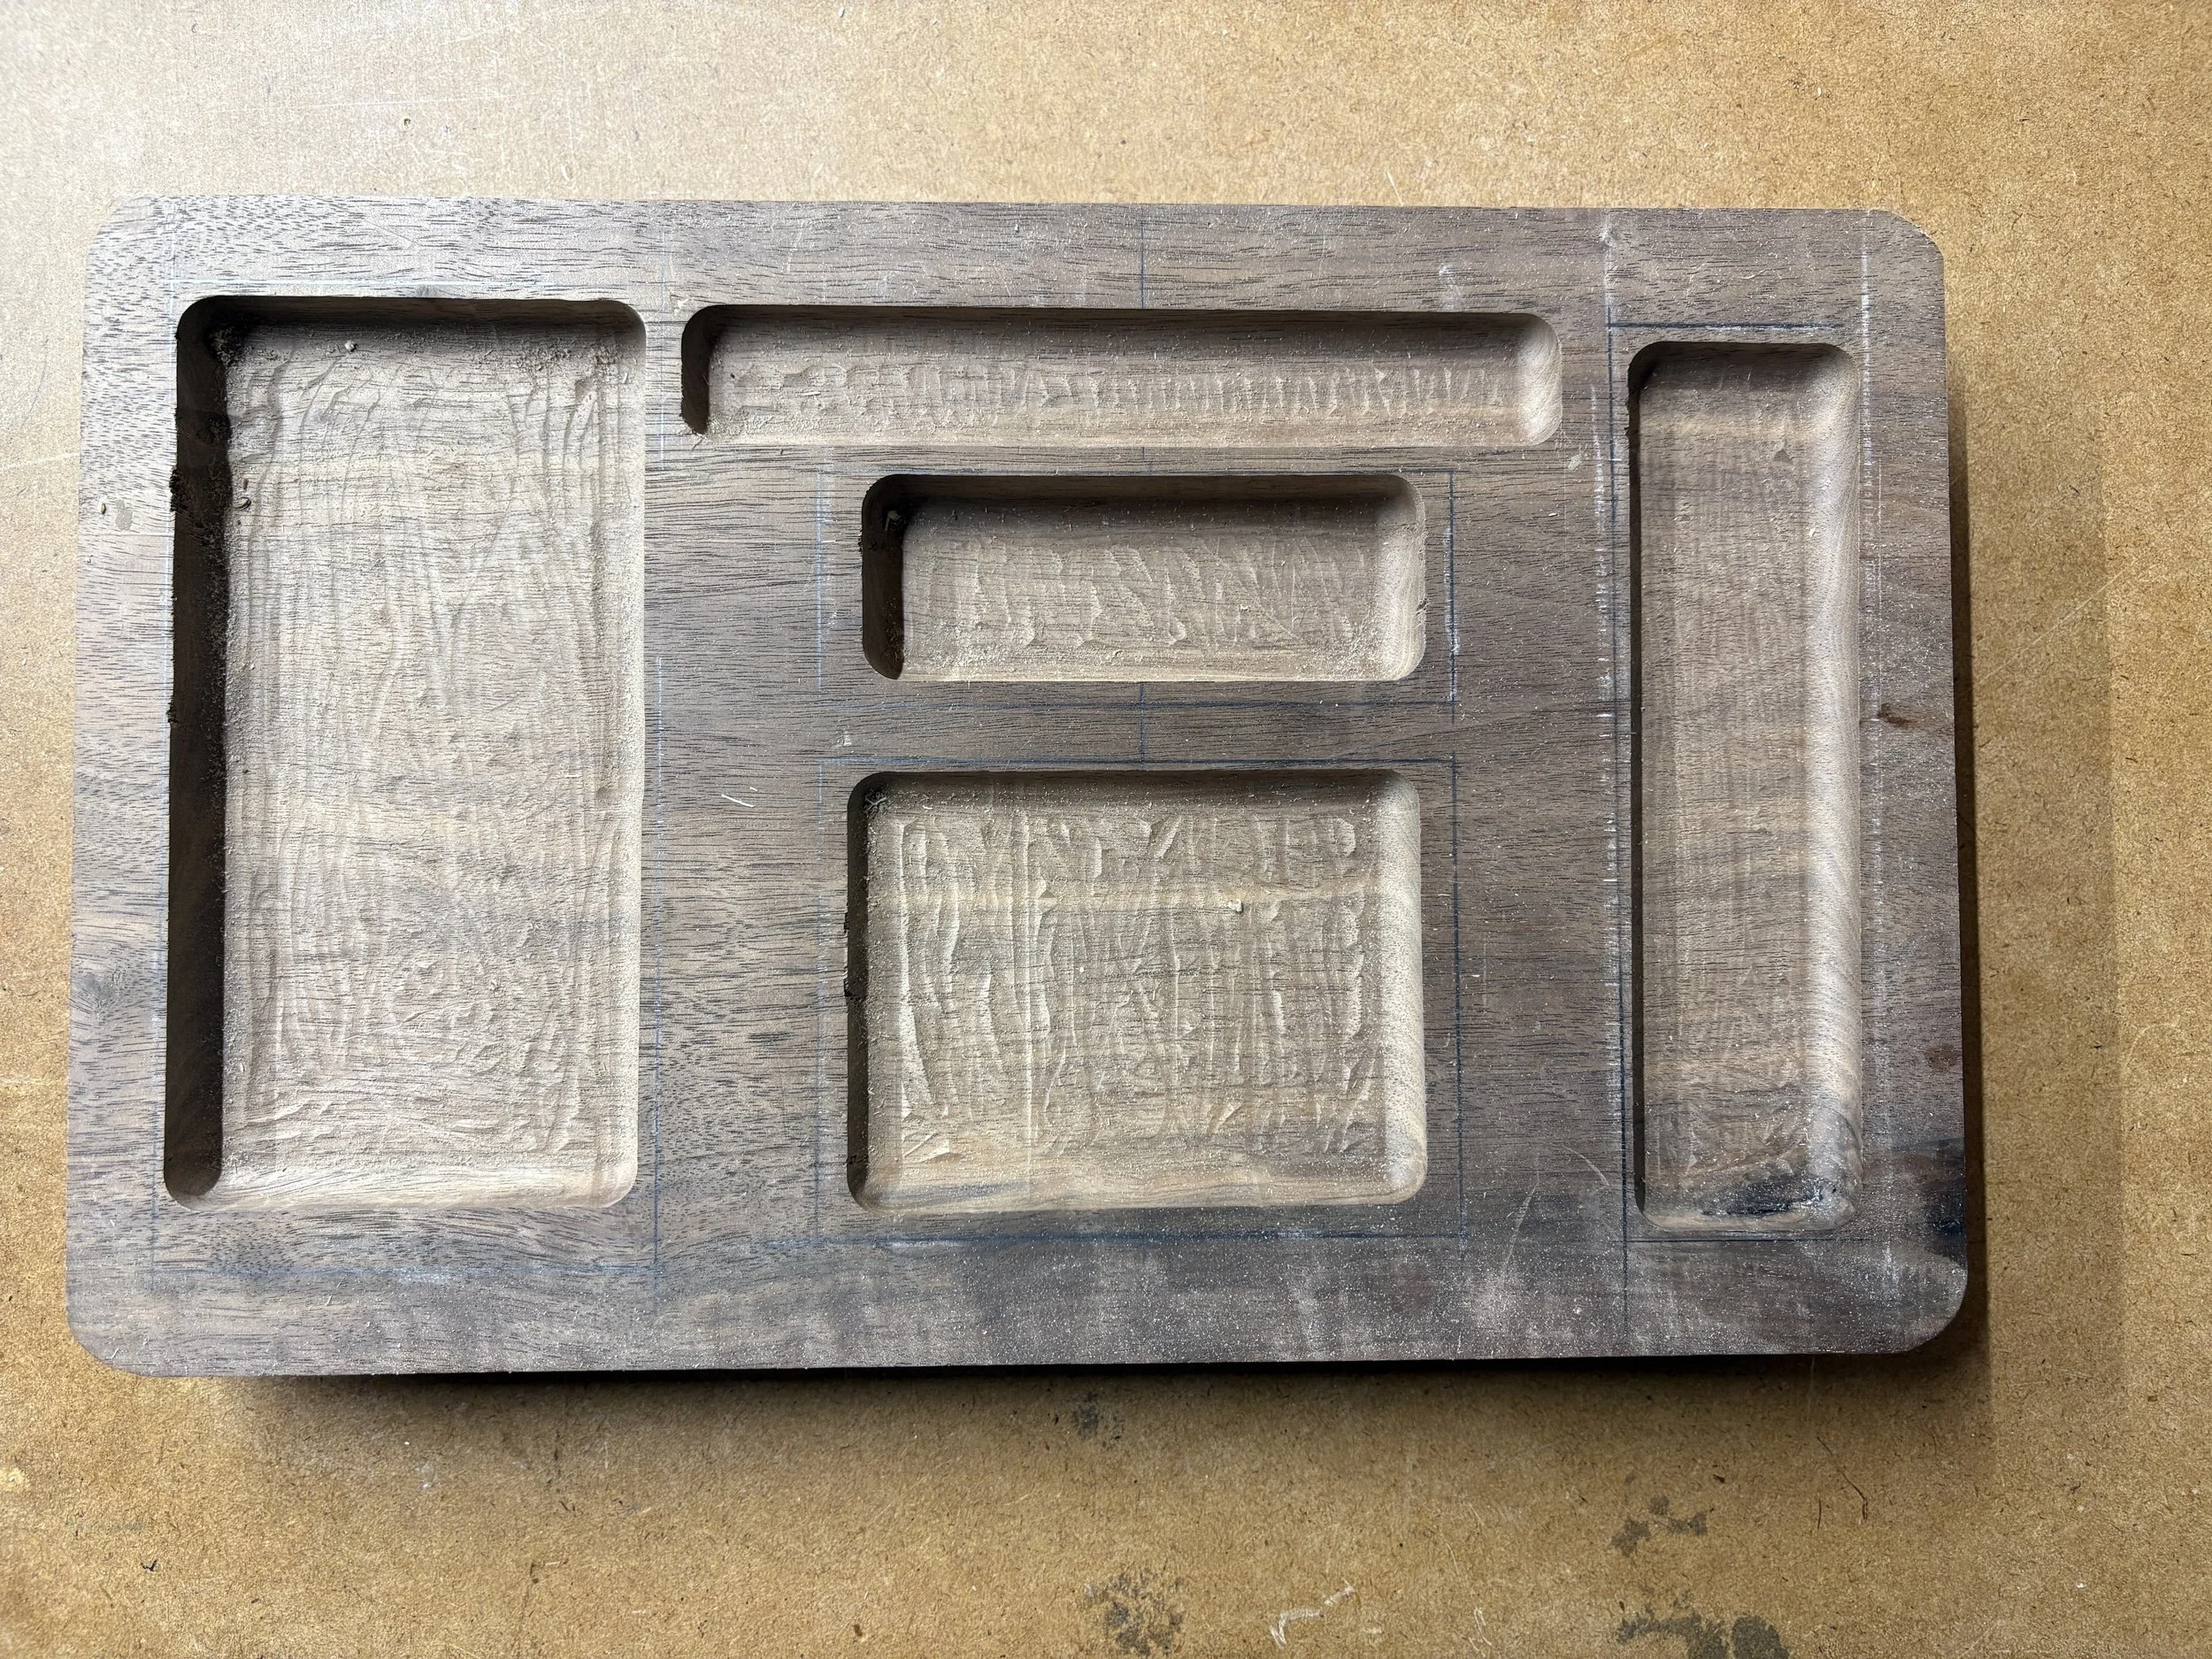
This version of the valet tray was definitely the most complicated to build. I first had to build a hole cutting jig, which I did, and then I had to very carefully measure, center, and cut slots for a bunch of different stuff. My Makita Palm Router crushed it, as it was powerful enough to work, but nimble enough to make precise cuts.

The idea was this would hold everything and, eventually, include a Qi charger. The hole cutting jig is quite nice and I have used it on other projects as well, though anytime a routing template has a metal edge you have to be careful.
Walnut is a spectacular wood that looks even more incredible with a simple Danish or tung oil finish. It is also a bit pricey. But a slab of it looks super cool and so I picked walnut to make the tray. As you can see there were a variety of slots—pen slots, a slot for a watch, a knife, a flashlight, and the big slot on the left for my phone. I never got to the point of implementing the Qi charger because, well, I got a new phone and the dimensions changed. I also did not like the idea of having my phone in my bedroom. Leaving it in my home office gives me a bit of separation and lets me unwind at night without the constant ding of updates.
The idea was a good one but for one major problem—your EDC is in a constant state of evolution. This design with its highly proscriptive slots, doesn’t support that evolution. There were other smaller concerns. It was also quite large, taking up about a quarter of my nightstand. Because it was just a single piece of wood moisture variations caused it to shrink and expand in a way that made it wobble later in its lifespan in a what that it did not earlier in its existence. In the end, it didn’t work and so I never finished it or cleaned up the router marks in the slots.
After about a year of use, I retired it. Then when I got the new iPhone it became obsolete as the phone was bigger than any of the slots on the tray.
Iteration 2: Baltic Birch Coaster

This design was going to fix all of the problems of the Chunk o’ Walnut design. It would be smaller, lighter, and not subject to as much moisture related wood movement. It also wouldn’t be as proscriptive of what could be placed in the tray. Here, I took two pieces of very high grade baltic birch plywood and glued them together. Once together I then cut them to a specific size, making sure the edges were completely flush between the pieces. I then planned on routing out a large cutout that gave the tray edges but did not cut through all of the plywood. I had hoped to make the cutout about half an inch deep.
This sounds like it should be easier than the slot after slot design of the Chunk o Walnut tray, but it wasn’t. By creating one large slot, things got, um, squirrelly with the router. The hole cutting jig could accommodate such a large void, but the baseplate of my cordless router is pretty small and unstable. It was too small to work with the hole cutting jig even with a bushing. I know I could buy a new base plate, but I wanted to avoid spending tons of money on new tools. I thought I was going to have to buy a router bushing, but I found one in my “miscellaneous” draw in the shop. Nevertheless, I couldn’t get it to work with my handheld router. So I switched to my router table.

The idea was to use the fence on my router stand (a Kreg stand and router table top) and two stops to hollow out the large slot. After figuring out dimensions, I dropped the birch coaster slowly down on to the bit completely blind and then cut away. I did this over and over again and it was incredibly slow and painstaking. Then, after lifting off one particular pass, somehow the coaster twisted a little and the bit ate through the “edge” of the slot. This was probably the fifth or sixth coaster I had used up and, after a violent discharge from the router table, I decided this method, while possible, was more dangerous than it was worth, especially given how many times I would have to drop the coaster on to the spinning bit totally blind. I am sure there is another way to figure this out, but I am not sure the results would be what I want. Short of a CNC router, this process, regardless of the numerous set ups I tried, seemed too slow and too dangerous to make it work.
Iteration 3: Walnut and Birch Sandbox
This was the final method of construction. It combined the smaller size, single open slot, and dimensional stability of the birch coaster design with the beauty of walnut. This took a very long time to tweak the sizes so that everything fit nicely, but I think the final design, the one at the top of this page, turned out the best. It would also be pretty easy to make, so I am probably going to make a few as gifts this Christmas.
It did require me to build a shooting board so that I could sneak up on that air tight fit for the walnut sides. Here is the shooting board with ultrahigh molecular weight polyethylene taking the place of a waxed piece of wood:
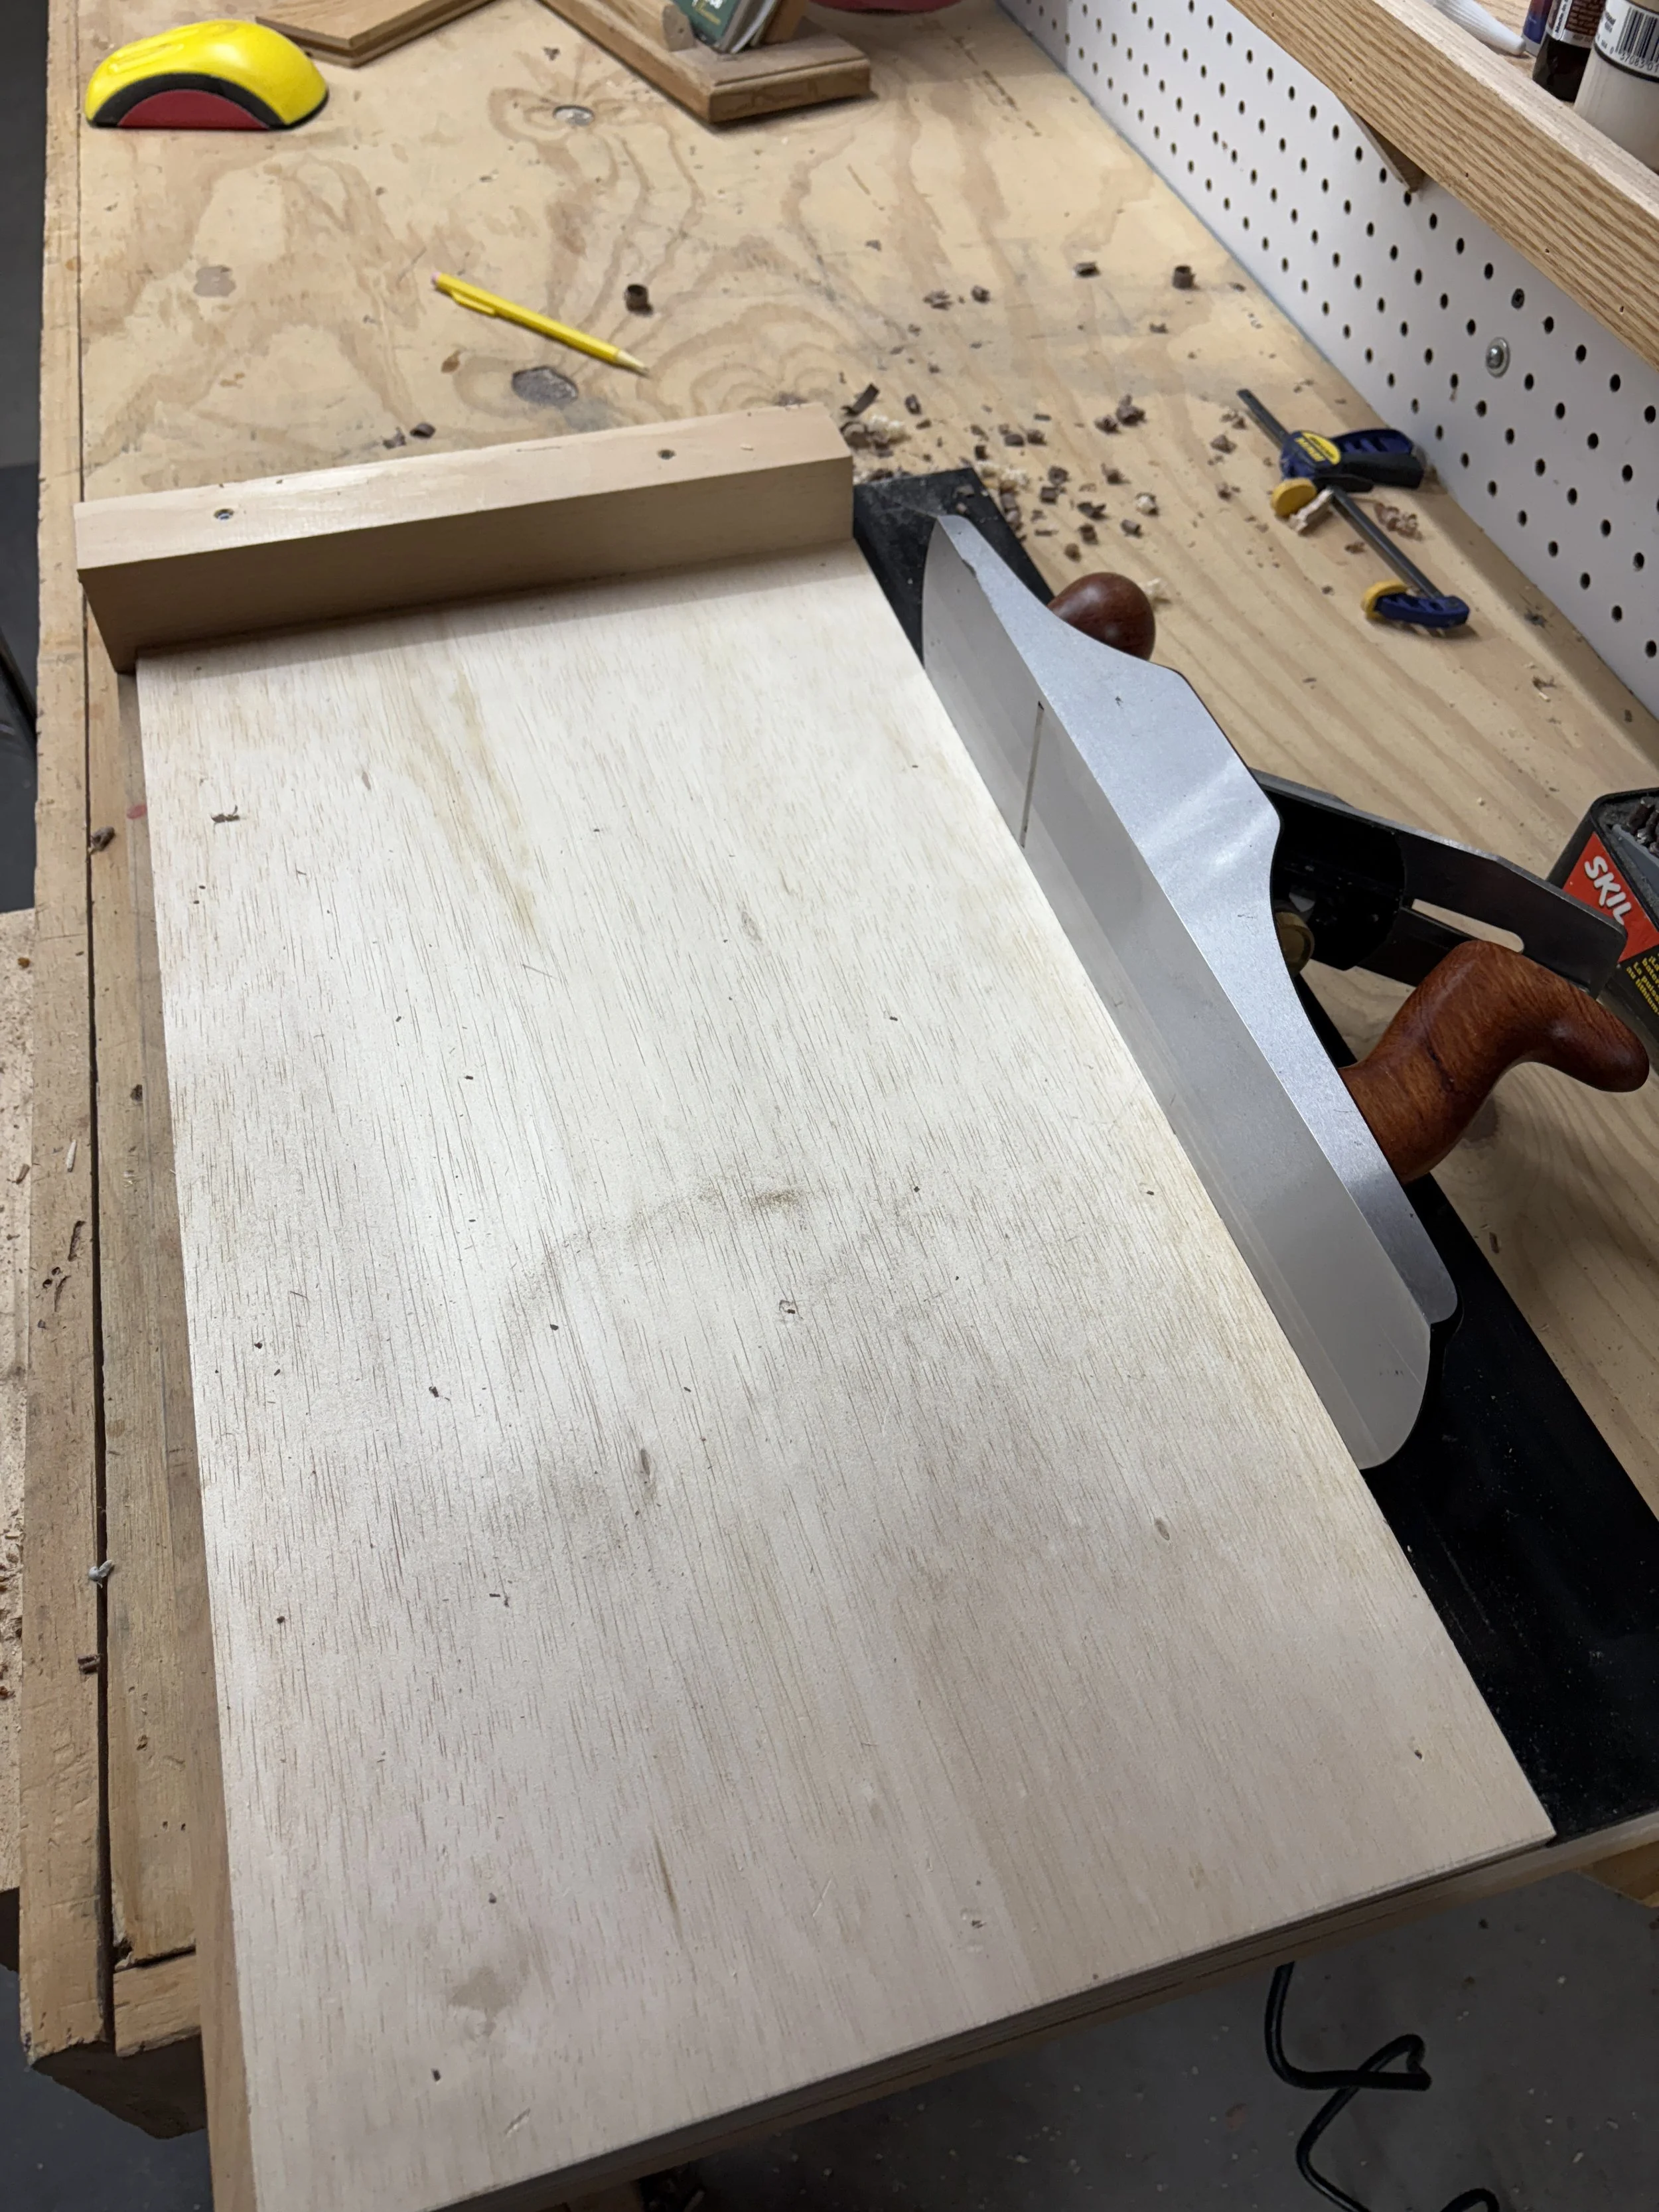
Once the Wood River 5 1/2 plane gets moving, provided the blade height on the plane is set correctly, the mass of the tool just plows through material. A few shaving cuts later and the wood pieces not only fit together quite snuggly, they are also almost polish-smooth.
Here is one thing—I have no idea what the dimensions are. I use a relative dimension system instead of a tape measure, and so I have no idea how big this thing is. In the future, I will probably use stops and fences to make lots of uniform pieces, but for this first tray, it was just a bunch of “about there’s”. One benefit of the relative measure method of woodworking is that you have less error. Since I am measuring from an object I can use the object not a tape measure as reference. No matter how good you are, when you measure object, then use the tape to transfer that measure to another object, you incur error. Relative measure, in addition to being faster and tool free, limits the number of times you measure thereby reducing the chance for the introduction of error. Since switching about six years ago, I have never even had a temptation to go back. My engineer father is driven crazy by this, but it doesn’t really bother me.
And so, after five years of thinking, building, f-ing stuff up, and buying tools, I finally have a valet tray that both looks nice and works well. This wasn’t complex to make. It’s basically a picture frame or a box without a lid, but this was never a construction challenge. It was, at all points, a design challenge. And, after five years, I finally have something I like. Until I change my mind. Or get a woodworking CNC.
Amazon Links